
Let’s start quilting!
OK, so, before we get started I want you to take a deep breath and do some of your favorite stretches. I’ll wait.
Now that you are all limber we will get started. If this is your first time quilting you will likely feel sore through your shoulders. You will have a lot of fabric draped all over as you try to juggle it all evenly through your sewing machine.
So, since this part can be a little daunting if you are quilting for the first time we are going to keep this as simple as possible and just quilt straight lines! You are relieved right!?
First we will start by sewing in a straight line along the seams of our quilt. We are going to start at one side and sew along the seam the entire width of the quilt. I am going to start in the middle of my quilt and move toward the right. Then I will flip the quilt and start at the seam next to the first seam we sewed and work toward the right again.
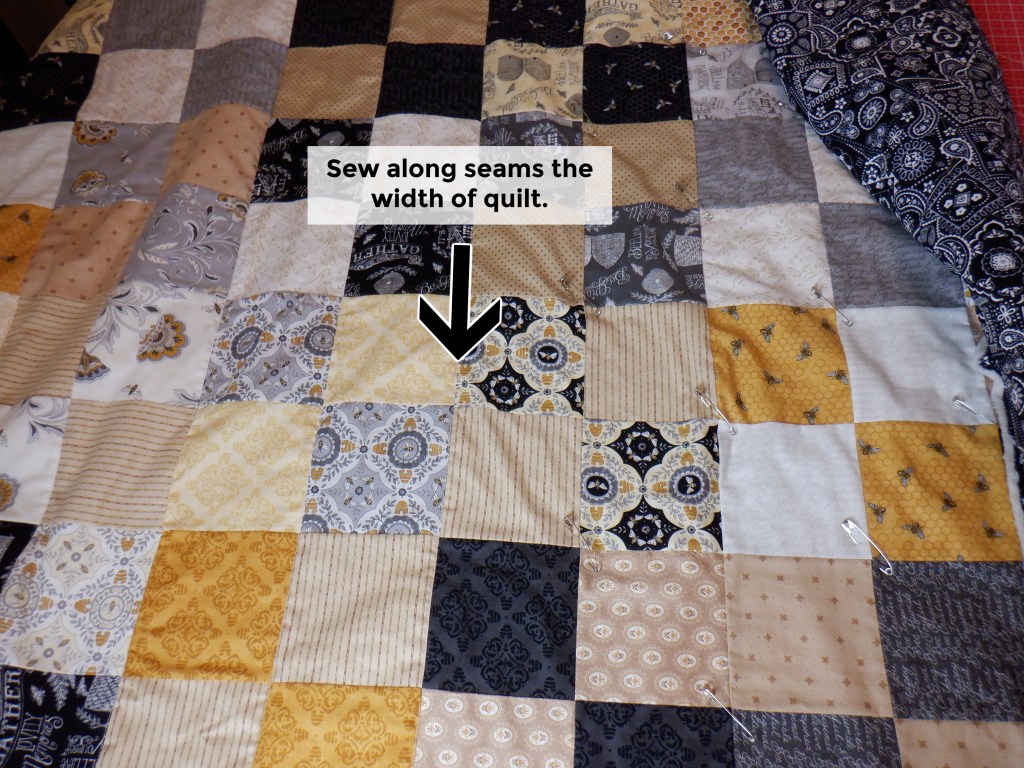

Sew along seam from end to end of your quilt. 
Stitch your seams in both directions. 
Gather fabric and place wherever you can to keep it from pulling down! 
Sewn Seam. 
Keep sewing those seams! 
End of row!
I like to start quilting at the middle of my quilt and work out so that I can smooth and even out the top of the fabric when needed. If you started quilting at one side and worked toward the middle you might end up with a bulge of fabric in the middle… and that would be sad!
Now that we have the seams working the width of the fabric all sewn we will want to sew the seams that are running the length of the quilt. I am still going to work from the middle seam out. The nice part here is that all of our safety pins will already be removed! YAY!

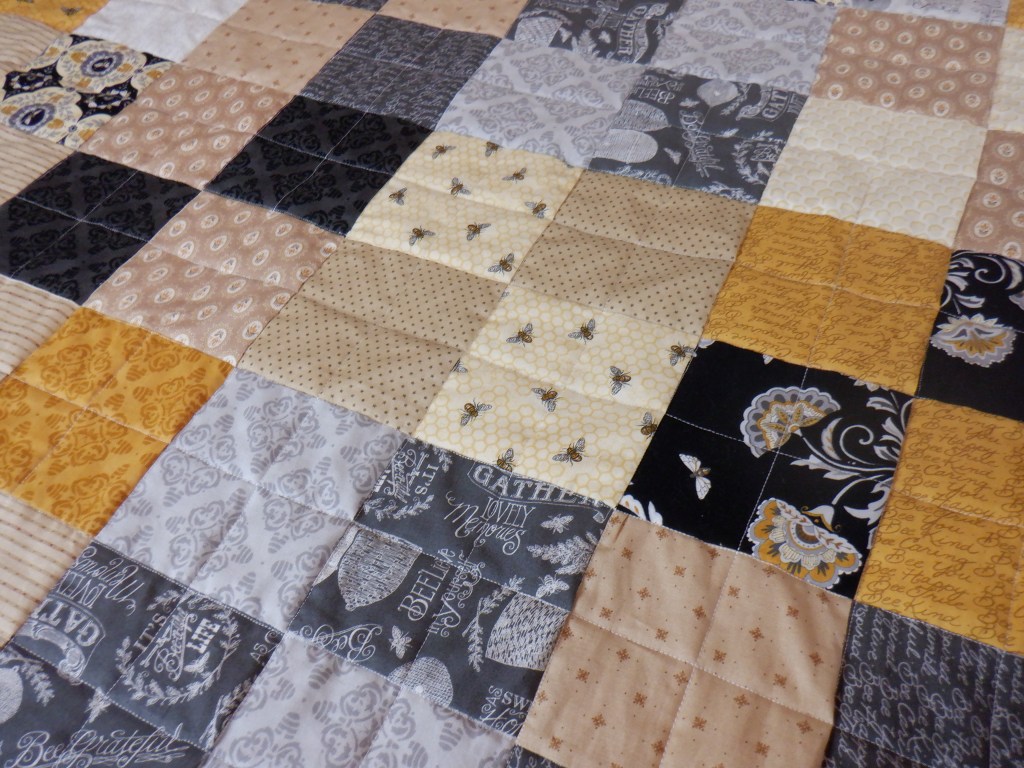
Now we have quilted boxes!
Remember when I said that you need to have batting and backing fabric at the very least 2″ bigger than your quilt top on each side? Well, this is why!


I am not a perfect quilter, and sometimes I mess up… I am still learning as I go. But, that doesn’t stop me one bit! I have a lot of fun quilting and you only learn by doing. Thankfully, I was saved this time around and barely had enough fabric for the back of this quilt!
Moving Along
So, we finished quilting along the seams in both directions. So, now lets add a little more interest to the quilt. This is where a quilters seam bar will come in handy. The bar will run along the seam of your quilt. You can adjust the measurement of the bar to the placement of your needle to get thread lines the distant you want from a seam.

If you don’t have a seam bar, you can purchase one by clicking the image below. However, that isn’t necessary if you want to skip this step completely. You can be finished when you are done quilting your seams in both directions.

To get the measurement I need I will measure the size of my block and half it since I want the quilt lines to dissect the block.

Measuring a quilt block. 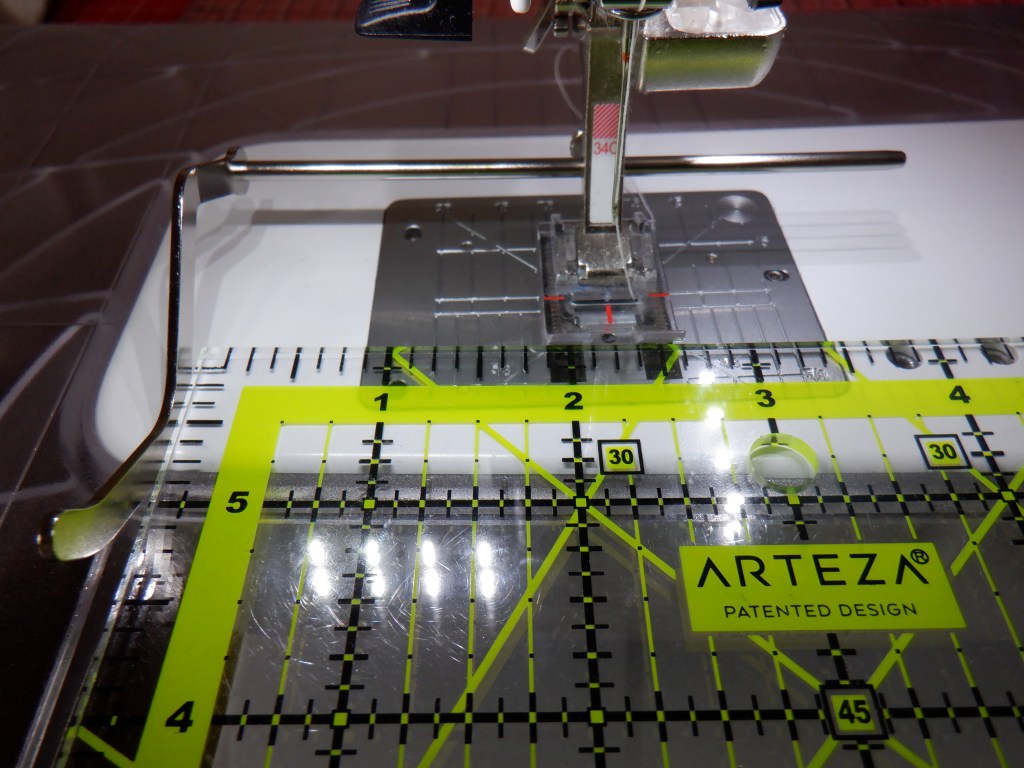
Getting the distance from the guide bar to the needle.
The quilt blocks for this quilt are 4.5″ after being sewn. So, half of that is 2.25″. I made the adjustment on my seam bar and tightened the screw so that it doesn’t shift around as I sew. Let’s get to work!
Line up the seam bar with a seam on your quilt and sew! It is seriously that easy.

All lined up! 
First row finished.
Sew along the middle of each block going the width of the quilt. Then turn and work the length of the quilt!
Note: Be sure to watch the seam bar and NOT your presser foot. If you watch your presser foot your bar may not stay even along the seam.
Once you have sewn along the middle of each block going both direction on your quilt then you are DONE! Pat yourself on your back and stretch again!
As I said before. I am not perfect, so I want to show you a close up of one of my blocks on this quilt.

I used to get so frustrated by these little mistakes. Seriously, you will want to as well, especially when you are just starting. You will expect and want perfection. I am here to tell you that you will just want to let that go. Unless you are entering a quilt into a quilt show… no one will care. My husband doesn’t notice these tiny mistakes unless I point them out… Friends don’t. And if you gift the quilt to someone they won’t either unless you point it out. I have been quilting for over 15 years and I still make mistakes. So please, don’t expect perfection on your first quilt. Just enjoy the process and let the small mistakes go.
So, with that said… I also want to give you a little warning. If you finished quilting all in one day your shoulders will likely be sore tomorrow! Especially if this is your first time quilting!
But for now lay your quilting out and celebrate! Make everyone in your home come look at it! Thats what I do anyway!
Ok. Now that we celebrated this huge accomplishment you are maybe starting to realize your quilt isn’t quite done. UGH right!?
Binding a quilt has long been my nemesis. I could never get perfect corners. My binding would pull, roll and twist.
But after a lot of trial and error I have a fool proof method for binding quilts. I will warn you though, if you have a method that already works then you might want to stick with it because my way does take more steps! But, if you struggle with binding then you will likely love my next post! So stay tuned!
Bye for now.
Create Beautiful Quilts is a participant in the Amazon Services LLC Associates Program, an affiliate advertising program designed to provide a means for sites to earn advertising fees by advertising and linking to Amazon.com. Some links may be affiliate links. We may get paid if you buy something or take an action after clicking one of these.
