
Making quilts is my passion. I love picking out fabric and patterns and then piecing everything together. I love the process and the sense of accomplishment when it all comes together.
But, sometimes, I need the satisfaction of completing a project in one day. So, when that urge happens I usually make a quilted tote bag. Quilt as you go tote bags come together so quickly.
However, recently I ventured into the world of homemade handbags, and wow, there is a lot to learn. Especially when it comes to interfacing options. Then there is leather, faux leather, waxed canvas, cork… the fabric options seam endless. We haven’t even discussed hardware yet.
But, the fun thing is that while you are learning many sites offer free video tutorials and even free patterns. That way, you can explore different patterns, gain skills, and figure out what you like and don’t like in a bag before you purchase more advanced patterns.
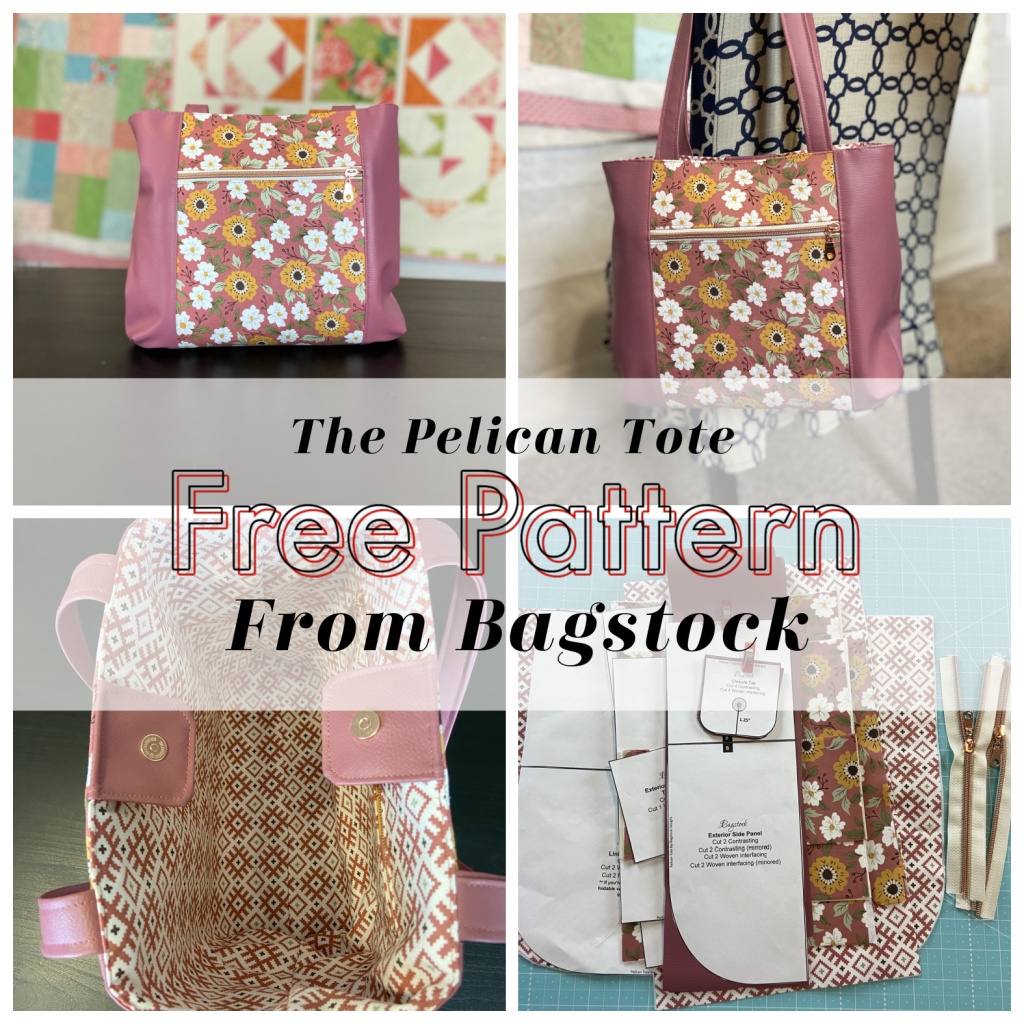
The pattern I am using today is free on Bagstock. you can find it HERE.
I think this pattern is a wonderful beginner pattern for many reasons, but my top reason is that it requires minimal hardware. You need two zippers and a magnetic snap. That is it. I like that because many bags require sliders, D rings, and swivel clips. That can be a lot to purchase when making a first bag.

For my lining fabric and main exterior fabric I chose quilting cotton fabric by Lella Boutique for Moda Fabrics. This line of fabric is so gorgeous. I love every single color and print. I purchased a half yard bundle from the Fat Quarter Shop HERE. But, you don’t need THAT much. I just purchased the bundle because I am obsessed with this fabric.
I chose some faux leather for the exterior accent fabric. I purchased the faux leather, decovil, and woven interfacing from Emmaline bags. You can shop her store HERE.
I would like to point out that this pattern does not call for decovil, it was simply a preference by me. I love the leathery sturdy feel that it gives to my cotton fabric. I will only be applying the decovil to my exterior quilt cotton fabrics.
The woven interfacing will be applied to all quilt cotton per the pattern instructions.
I chose a rose gold zipper and magnetic snap from My Handmade Space. You can purchase the hardware HERE.

There are a few pattern pieces that need to be taped together. The pattern provides guides and a diagram to ensure you put them together correctly.

All my pieces are cut, woven interfacing has been ironed on as well as the decovil to my exterior cotton pieces.

Here is the front zipper pocket completed. This bag is already coming together beautifully!


Next I sewed the accent panels onto the front and back center panels of the bag.
The pattern calls for a pocket to be added into the lining of the bag. I recently learned this skill and it’s almost like magic watching it come together.


The magnetic tabs were one of the more challenging aspects of this bag. If I chose to work with the quilt cotton I think it would have been a lot easier. The bulk of the seams really wanted to push my presser foot in uneven lines.


I give myself grace when things don’t turn out perfect. I figure I can simply point out the flaws if people don’t believe I made it.
I then made the straps and basted them to the bag.


At this point the bag really came together quickly.
I sewed the linings right sides together and the exterior pieces right sides together following the pattern instructions.


Now that the lining and exterior are prepped and ready to go it is time to attach them to each other. Turn the exterior right side out and slip it inside the lining. The lining should be wrong side out. Follow the pattern for specifics.
I used about a million and one wonder clips to keep my bag all even and lined up nicely.

My trick for getting the top of the bag perfectly clipped is to start at the side seams. Clip both side seams first and then work around the bag.

After the top of the bag is sewn it is time to flip the bag right side out through the interior pocket.

The home stretch! It’s almost time to celebrate!
I clip the top of my bag in place and then carefully top stitch around. Make sure you stitch the interior pocket closed to or you will be fishing all throughout your bag for loose change!


This pattern was such a joy to work with. Be sure to go give it a try… I mean, it’s FREE after all!
And honestly, the pattern is so clear, detailed, and includes a ton of photos, she should be charging for it. So, take advantage of the generosity!
If you would like, you can also check out my YouTube review of this pattern.
Bye for now.

2 responses to “Free Handbag Pattern!”
Happy New Year! Your purse is beautiful! Great job — I’ll definitely add the pelican tote pattern to my list! I too use Decovil!
LikeLike
You will love the pattern! It was so easy to follow!
LikeLike