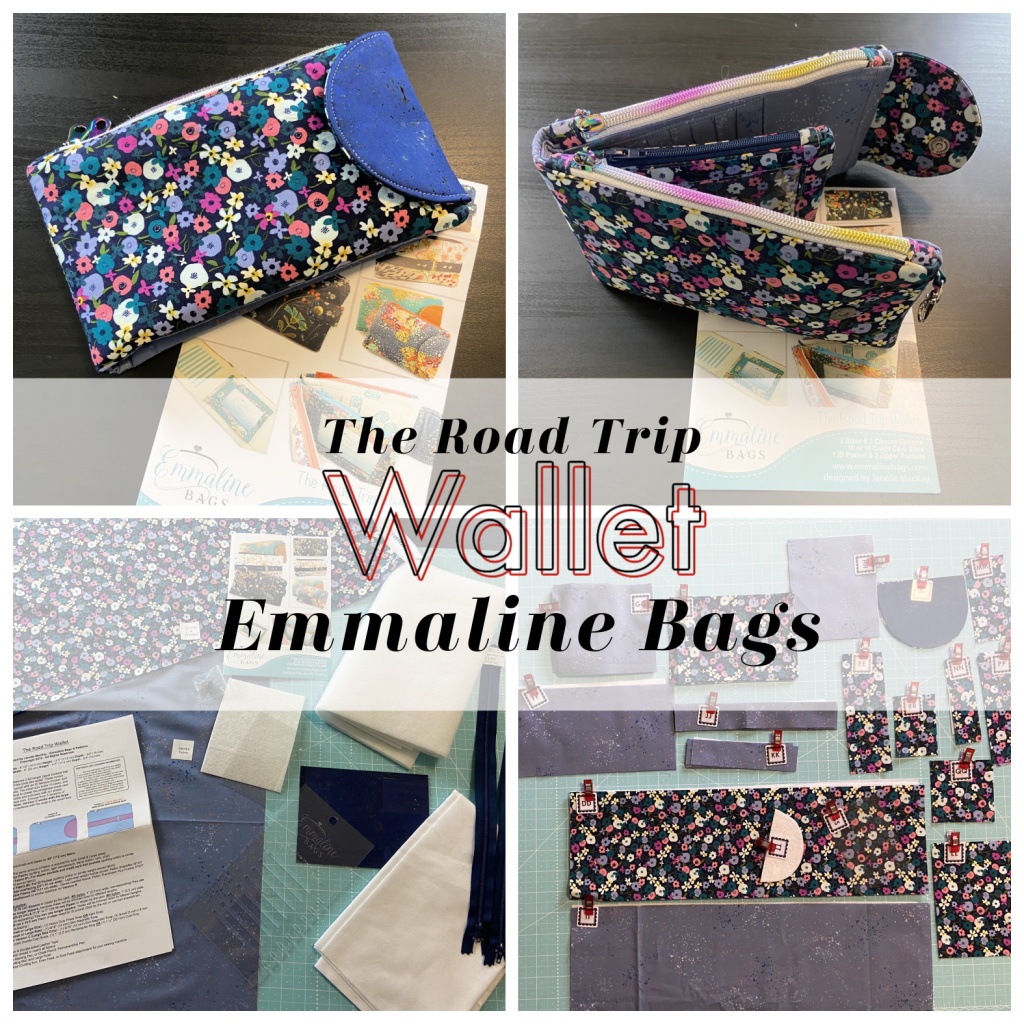
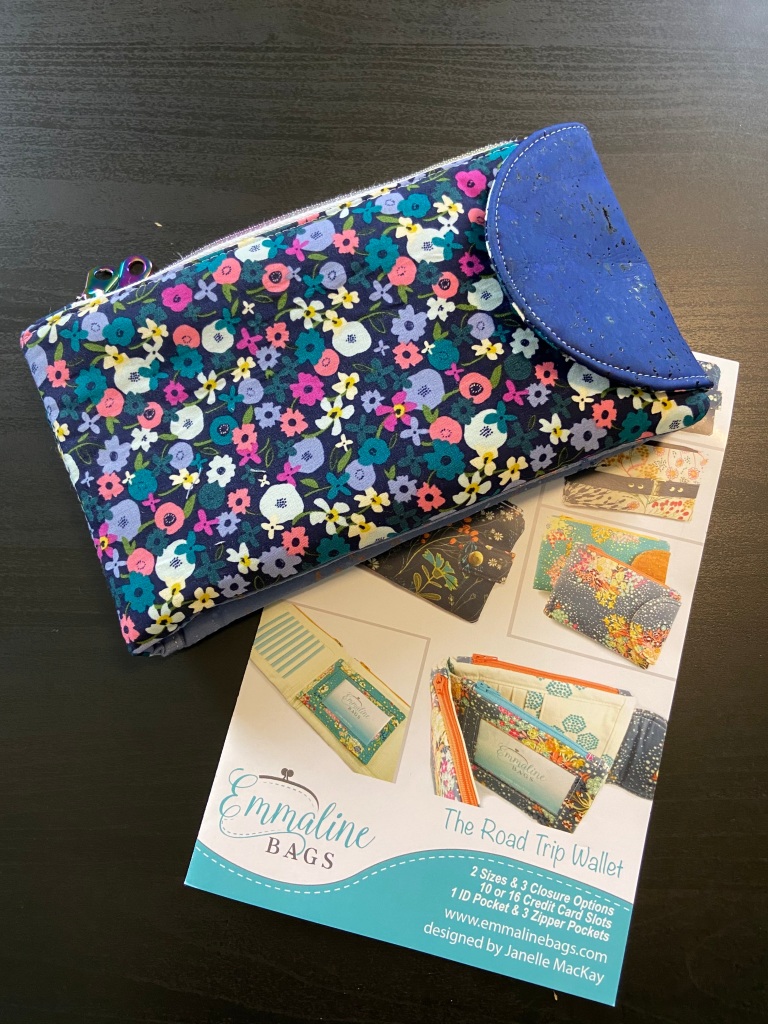
Goals Goals Goals. It’s coming up on the new year so naturally we often start thinking about goals we have or may want to achieve in the new year. One of my goals is to get better at making wallets and bags. So, I purchased this cute kit from Emmaline Bags! I just love purchasing kits. Yes, they can seem like they cost a lot of money, but really, I think it saves time on gathering items… plus, it’s already coordinated so that saves me from the hassle of stressing over colors, patterns, and choosing hardware!
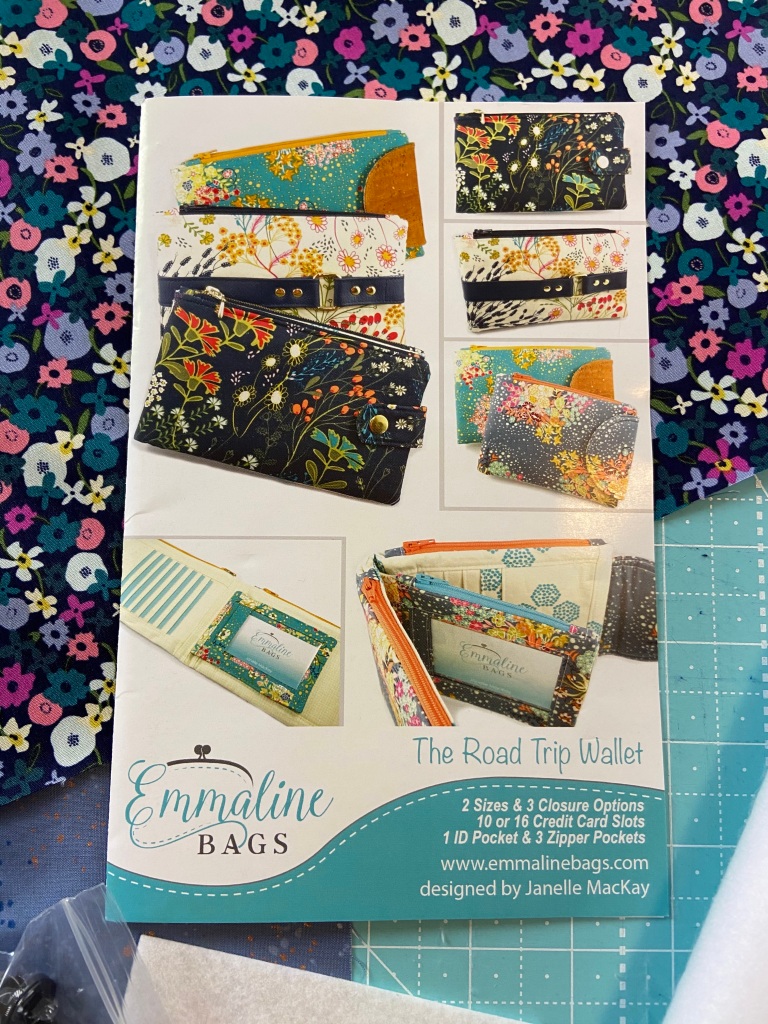
I loved that this pattern comes with so many different options because then I could make the wallet again, but it will look a little different!

This kit came with everything I needed to make the bag… aside from, you know, a sewing machine and basic sewing supplies.
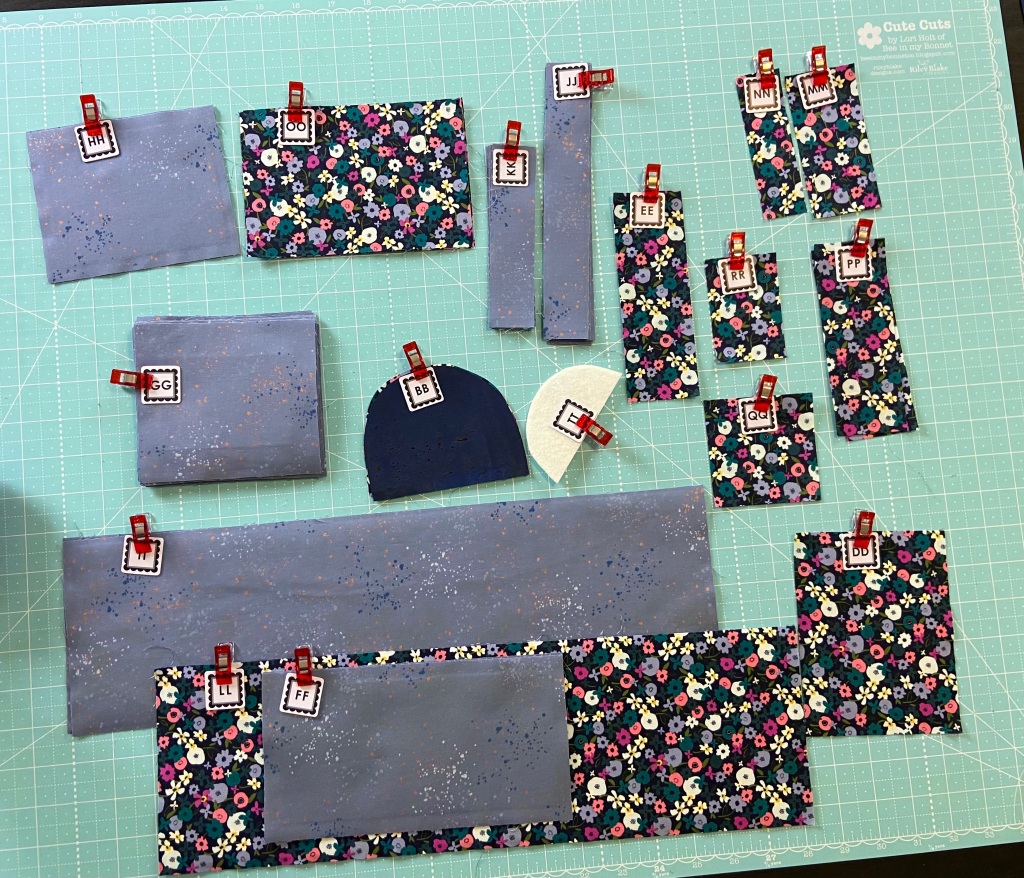
Here are all my pieces hacked up and ready to go!

I did iron on the interfacing next.
One of the hardest parts of this project was sewing all of the card slots.

However, the kit I purchased did provide a template for marking all of the card slots. I am sure that saved me a lot of time since I didn’t have to measure out each line!
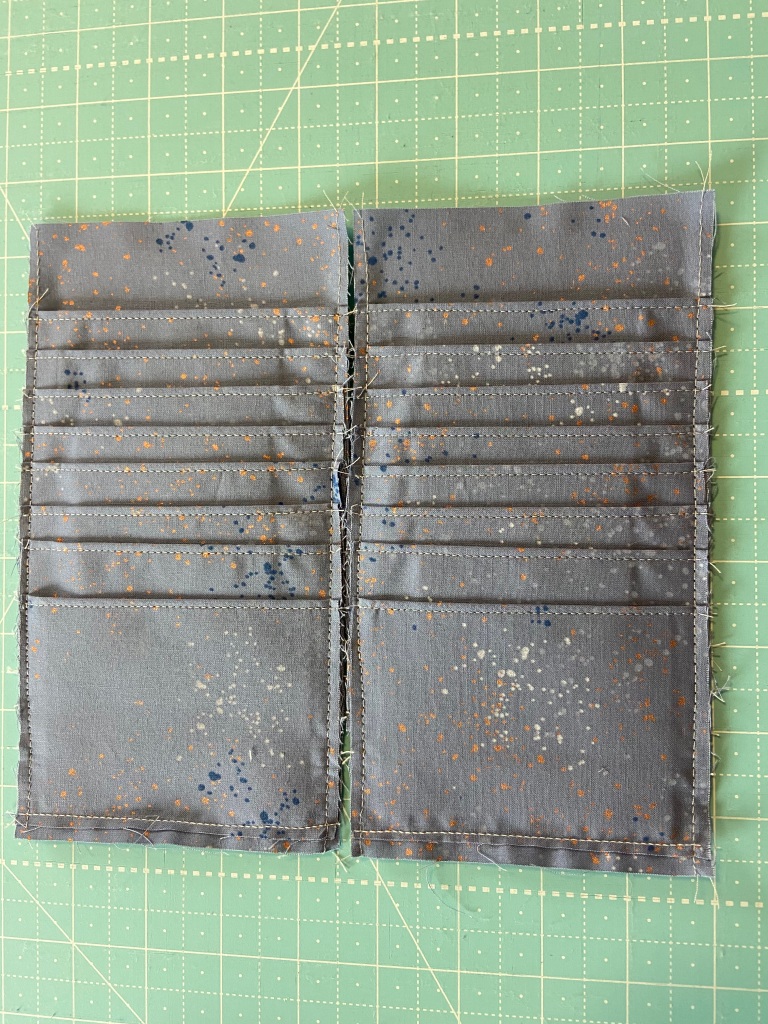
The reason this was the hardest step is all of the layers these folds created. It was really hard to sew straight along that edge. I had to go really slow and raise my presser foot when I could. While this step was a challenge, going slow and taking my time did give beautiful results.
Here is a look at a few more steps. I put the borders on my card slots, made my ID pocket with a zipper pouch and the snap closure.

At this point I decided to use my zippers that I ordered from My Handmade Space. They are so beautiful! And to be honest, I just didn’t want to wait any longer to use them.

Here is how the zippers will look next to the exterior fabric. I think they really match the fabric quite beautifully! The yellows, pinks, and blues can all be found in both the fabric and the zipper.

Now I have the zippers attached and we are reaching the home stretch on this project!

These colors really go amazing together. At this point I am really starting to see how everything will look and am getting anxious to finish!


Finishing up! Getting ready to flip after I trim my seams.


I really love how this wallet turned out. I did decide to add a clip to mine so I could attach a key fob if I wanted the extra security when carrying this wallet.
I am also so glad I chose to use the rainbow zippers on the two outer pockets! They added a touch of fun to the finished look!

If you would like to purchase either the wallet pattern or the zipper hardware here is the information for both companies.
If you would like to make this wallet you can purchase the pattern here.
If you would like to purchase the kit it is here.
I switched out the zippers from my kit for fun rainbow zippers from My Handmade Space. Here is a link.
I also recorded a video sharing my progress and a more detailed review of the pattern.
If you have a wallet or bag pattern you have been wanting to try, but aren’t quite sure about how complicated it might be let me know in the comments! I just might choose it to review next!
Bye for now!
