

Today I am going to be sharing with you two of my favorite block patterns. Why are they among my favorite? Well, because they both come together really fast and they are so versatile. They are great stand alone blocks, meaning they can individually be used to make a beautiful quilt, and then combined, they can really be laid out in so many different ways to make unique designs within a quilt.
After making each block I am going to share how I laid these two blocks out to make my Time Traveler Quilt.
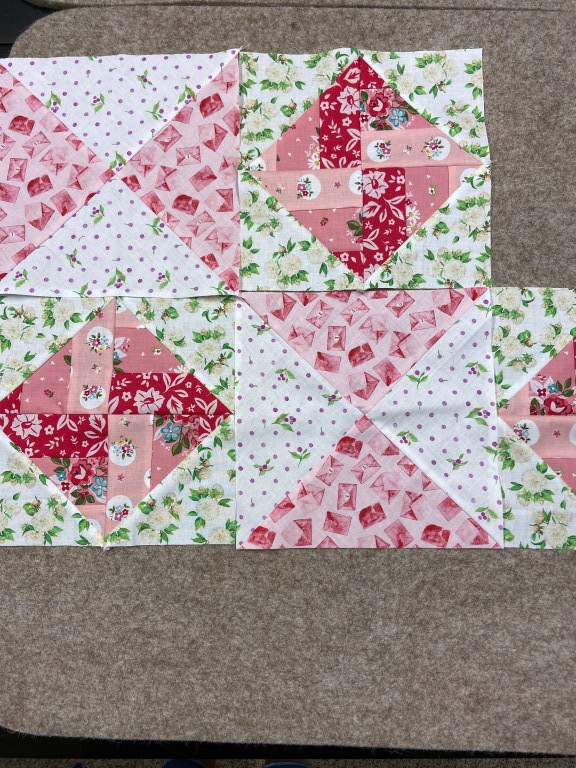
So, the two blocks we are making are the Diamond Block and the Hourglass Block.

Diamond Block 
Hourglass Block
Making the Diamond Block
The diamond block that I am making today is made using strips of fabric on one side of the HST (half square triangle). You can make this block using traditional HST’s as well.
To start this block you will need 3- 2.5″ x WOF (width of fabric) strips sewn together lengthwise. You can either cut these strips from yardage or use Jelly Roll Strips. The block will look best if you used strips that go together nicely but are different in print, shade, or color.
If you would like to make a quilt that is roughly 40″x 49″ without a border then you will need 10 diamond blocks and 10 hourglass blocks.
To make 10 diamond blocks you will want to make 4 strip sets. So, cut or pick out 12 jelly roll strips.

In addition to the strips you will also need some background fabric for this block.
You will need two 6.25″ background squares to complete each Diamond Block. So, if you are making a quilt the same size as mine cut 20 – 6.25″.

Once you sew your strips together in sets of three you will cut that strip set down into 6.25″ squares as well.

You will need 20 squares if you are making 10 blocks.
Now mark corner to corner on the wrong side of all of your background squares and lay them right sides together on your strip squares.

Sew a .25″ seam along both sides of the marked diagonal line.

Cut along the marked line and trim to 5.5″ squares. I like to use the Clearly Perfect Slotted Trimmer here.


Press open your seams. I find that the seams lay flatter if I press toward the solid triangle.

Lay our your diamond shape and sew together.


Finished!
Making the Hourglass Block
If you thought the diamond block was easy to make, then well, you will be even more impressed with the ease of this block!
You will first cut your two contrasting fabrics into 10″ squares.
Cut 10 squares of each fabric if you are planing to make 10 blocks.

Now lay your blocks right sides together and sew a .25″ seam along two opposite sides of the square.


Now you will cut your squares in half corner to corner. It is ok if you cut through a few threads they will open easily when you open them.


Now press your seams open. I like to press to the darker fabric if I am able to. But, to have nice seams that nest together press both sides to the same fabric each time.
Lay our your block and make sure everything lines up correctly. Lay your blocks right sides together and pin at the seam to ensure they line up nicely.
Sew across using a .25″ seam.
Press open.


Finished.
Laying out your quilt
Now that you have finished 10 blocks of each design you can plan out the layout of your quilt.
Here is mine using the Stonehenge Fabric line.

It is hard to tell on my quilt, but the layout of the hourglass block changes in each row.

You can see the layout of the hourglass blocks better here.
Just to get more ideas of fabric design and color options here are some more blocks I made.
I will be quilting my Time Traveler quilt soon. If you would like to see it finished then please subscribe to my blog!
I hope you enjoy making your quilt!
Happy Sewing!
Bye for now.

One response to “Free Quilt Pattern”
Another beautiful layout — love both quilt blocks! Your Stonehenge time traveler is gorgeous…I’m looking forward to how you quilt it! Thanks for the tutorial!
LikeLike